Blog
How To Do A Lash Lift
May
Do you find yourself talking to clients about the hassle of searching for that perfect mascara, only to find too many that are clumpy, messy, or flaky? Or maybe they find one they love and it gets discontinued! If lash extensions aren’t the solution, there’s another option — lash lifts!
We’re going to cover what lash lifts are, a step-by-step guide to perfectly lifted lashes, and proper aftercare. Ready? Let’s get into it!
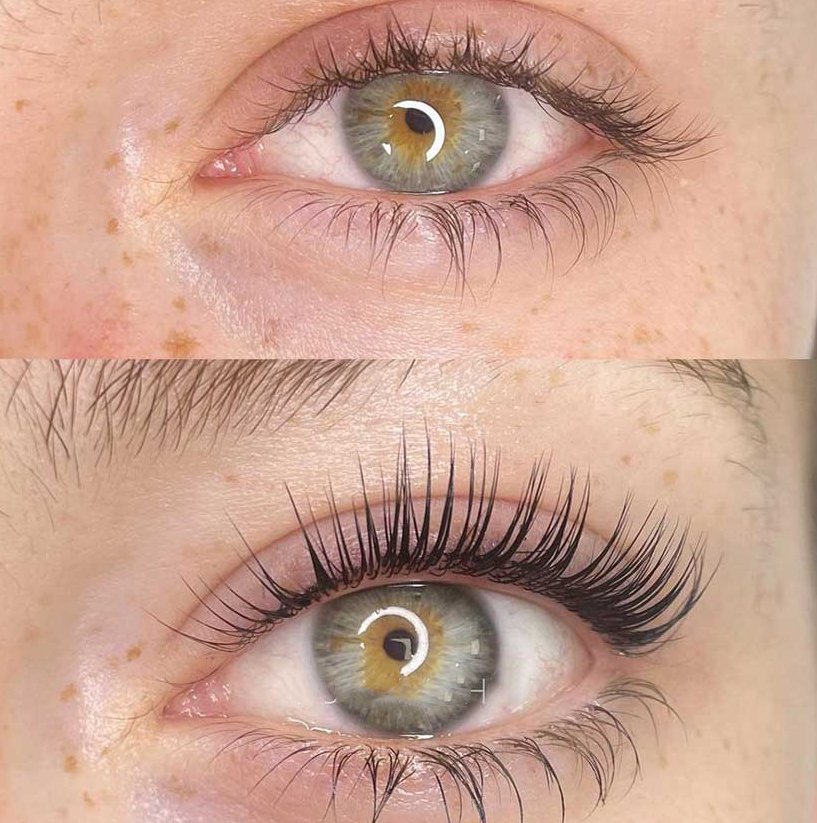
What Is A Lash Lift?
Lash lifts involve fixing the individual eyelashes to a rod or shield that will manipulate them into a new, neater curl. This is achieved by using several products that break down the bonds in the eyelashes and then rebuild them once they have been moved into place.
How long does a lash lift last?
A lash lift and tint service can last anywhere from 3 to 8 weeks, depending on the client’s natural lashes and how they care for their lashes. Proper aftercare is key; we’ll get more into that below!
A Step-by-Step Guide to Using Our Lash Lift Kits
Pre-Service
Here are a few steps we recommend performing before starting the actual lash lift service!
EYELASH ASSESSMENT
Make sure to assess the lashes in order to determine the correct processing time (how long to leave the products on). Overprocessing the lashes can leave them dehydrated and dry.
1.Very fine to fine lashes – 4-5 minutes
2.Medium lashes – 6-7 minutes
3.Thick lashes – 7-9 minutes
CLEANSE
All traces of makeup should be removed from the eye area with a makeup remover. Then you can go in with a lashcleanser to further prep the area. Make sure to rinse off all products and dry the area completely!
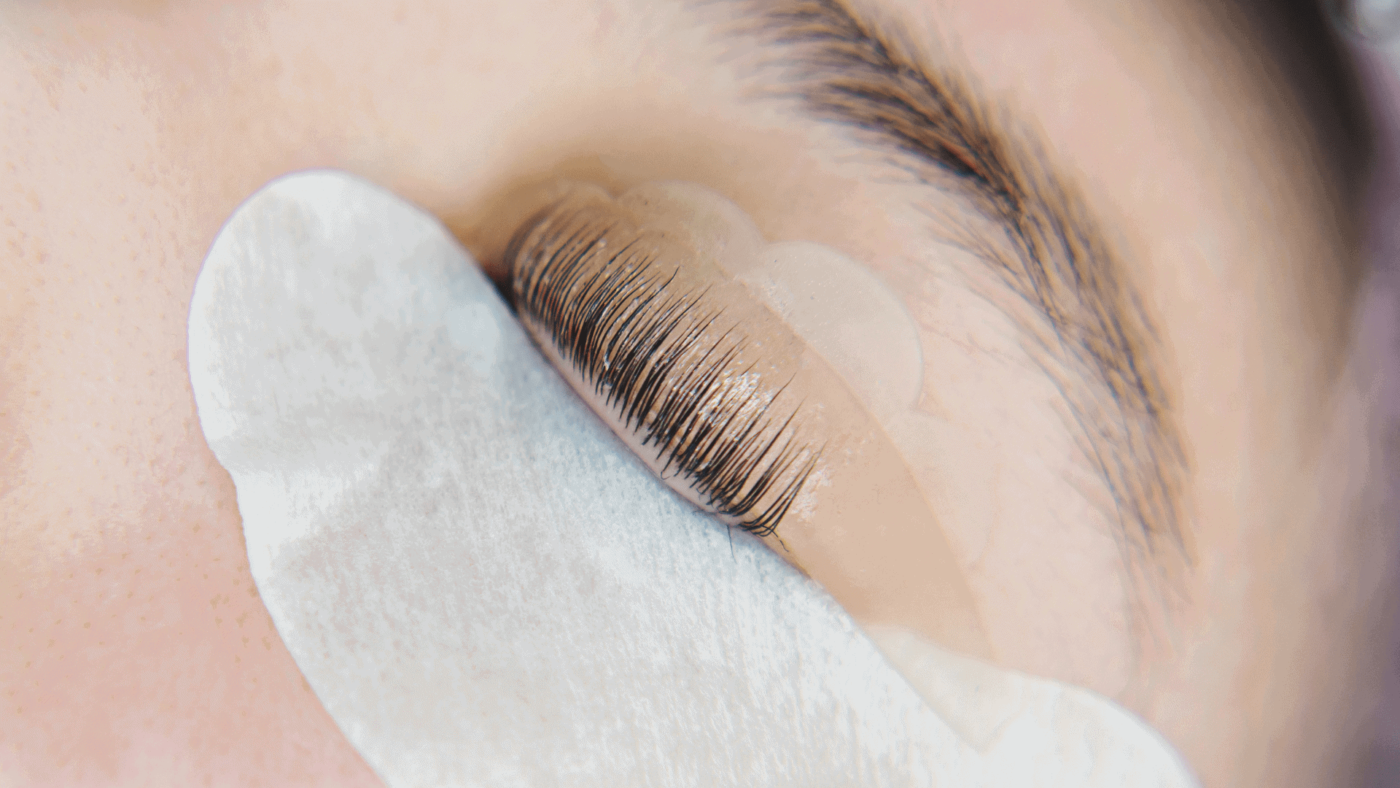
EYEPAD AND TAPE
Apply an eyepad and tape to the under eye area to protect the lower lashes and delicate skin.
SHIELD OR ROD APPLICATION
Now is the time to select the shield or rod you want to use, depending on the desired curl. You should also take the length of the lashes into consideration.
Apply the shield or rod as close to the lash line as possible without any gapping; no glue is required for this. You can also use tape. Then just hold it in place until it stays and repeat on the other eye!
ATTACH LASHES TO SHIELD OR ROD
Using a clean applicator. Starting at the outer corner, apply the balm to a small section of the shield or rod. Try not to use too much balm — it will take too long to set!
Use a Charmelash Lifting Tool to pull the lashes onto the shield or rod and make sure they stick. Then use a Y-comb or other tool to straighten the lashes. Pay careful attention to how they are laying, ensuring they are well-separated and not criss-crossed. Work your way across the lash line by applying the balm in small sections and combing as you go.
Then repeat on the other eye!
Lift Service
Once your client is cleansed and prepped, the lift can begin!
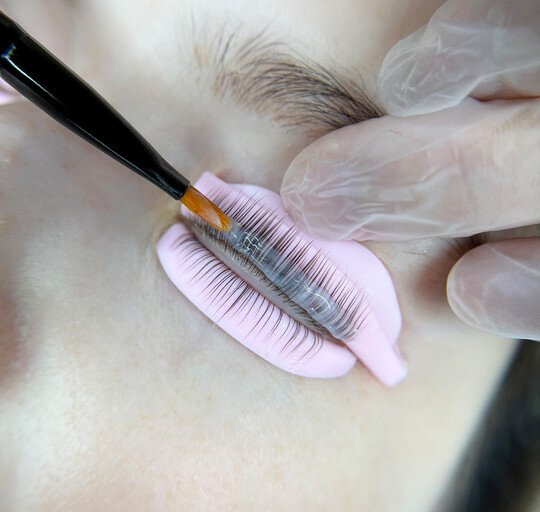
STEP 1: LIFTING CREAM
To start, dispense half the sachet of Lifting Cream into a Lift and Lam Palette.
Starting at the outer corner of the eye, use an applicator to quickly apply the Lifting Cream to the base of the lashes. Use a dabbing motion to ensure the cream has covered the apex of the shield or rod. Continue working quickly to bring the cream upwards to the mid-lash area, but stop before you reach the tips of the lashes.
Then start your timer, and repeat the process on the other eye!
When the timer goes off, wipe upwards to remove all traces of Lifting Cream with a clean applicator, starting from where it was applied. Repeat on the other eye when that timer is done!
STEP 2: NEUTRALIZING LOTION
Dispense half the sachet of Neutralizing Lotion into a Lift & Lam Palette.
Beginning at the outer corner, use an applicator to cover the lashes from base to tip with a generous amount of the lotion. Start your timer with the same time from Step 1.
Repeat this process on the second eye and start another timer!
Once the timer goes off, wipe upwards to remove the Neutralizing Lotion with a clean applicator, starting from where it was applied. Repeat on the other eye when that timer is done!
STEP 3: HYDRATING SERUM
If no tint is required, apply the Hydrating Serum to the lashes with a clean applicator and allow the lashes to dry. Remove the shield or rod, but the serum should stay on the lashes!
Aftercare
You’ve worked so hard on your lash lift — let’s keep the lashes beautiful and healthy as long as possible! Make sure to educate the client about the best ways to take care of their freshly lifted lashes. Many of these tips are to help your client keep the Hydrating Serum on for about 24 hours.
Avoid water for 24 hours
Can you wear mascara with a lash lift? NO. Avoid mascara for 24 hours and ditch the waterproof mascara
Avoid rubbing or touching the eyes for 24 hours
Avoid harsh products near the eyes or on the lashes
Use castor oil to moisturize every night
A good lash lift can make a huge difference in the everyday life of your client! They are one of the best services to provide, and we’re here to help you every step of the way.
Have questions about lash lift and tint kits or other services? Feel free to reach out — we’re always here to help!
Hi! Do you know if they make any plugins to assist with Search Engine Optimization? I’m trying to get my website to rank
for some targeted keywords but I’m not seeing very good gains.
If you know of any please share. Many thanks! You can read similar
text here: Blankets